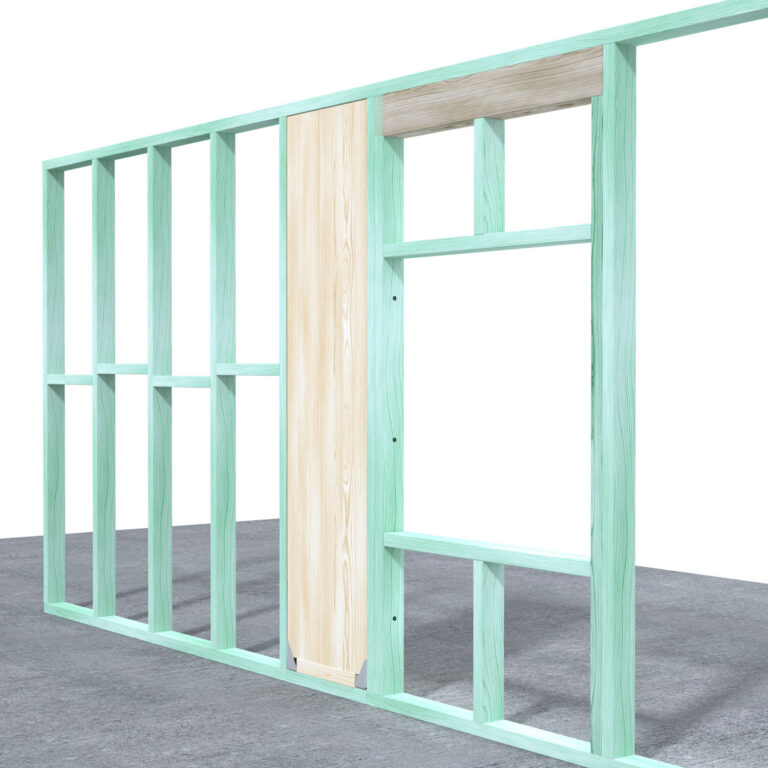
Installation Guide – MegaHold Down Bracket Face Outside
Step 1
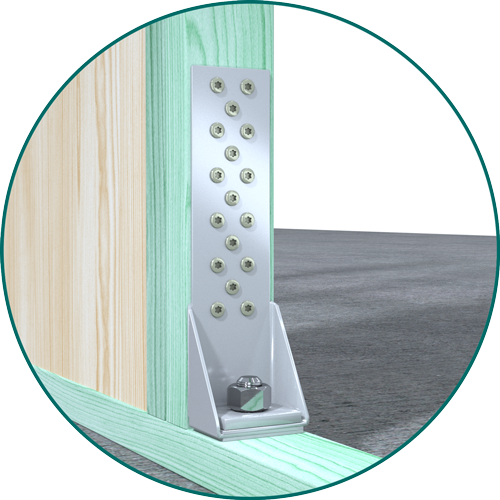
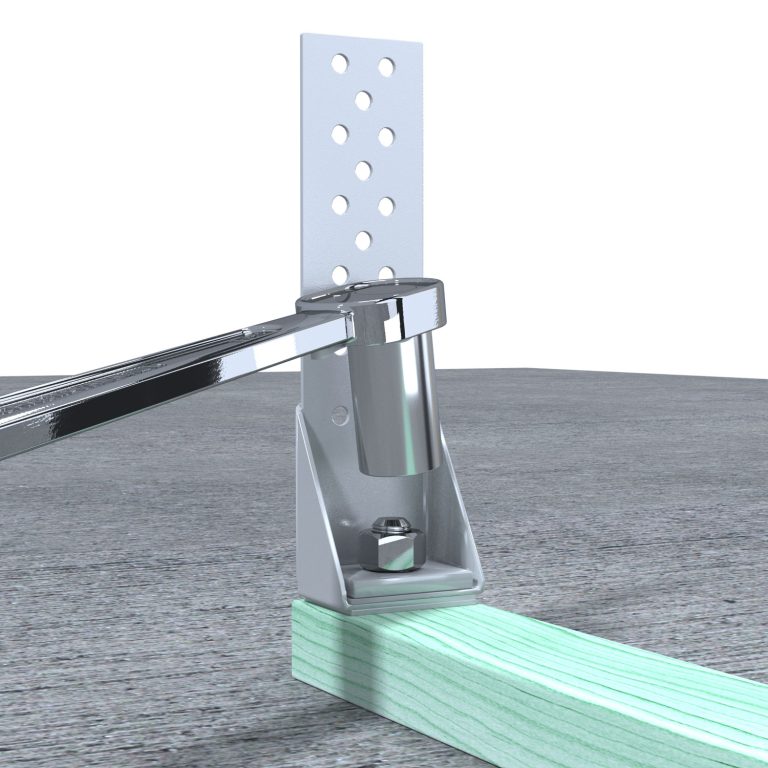
Fix the anchor* in the concrete slab through the wall bottom plate at the designed location without tightening it. Then, place the MegaHold Down bracket with the washer plate through. Apply adequate torque to tighten the concrete anchor according to the anchor supplier’s instructions.
Anchor*:
M20 for Small and Medium Short Wall Bracing kits (STD200-100, STD200-150, STD320-100 & STD320-150)
Note: Concrete Anchor is not included.
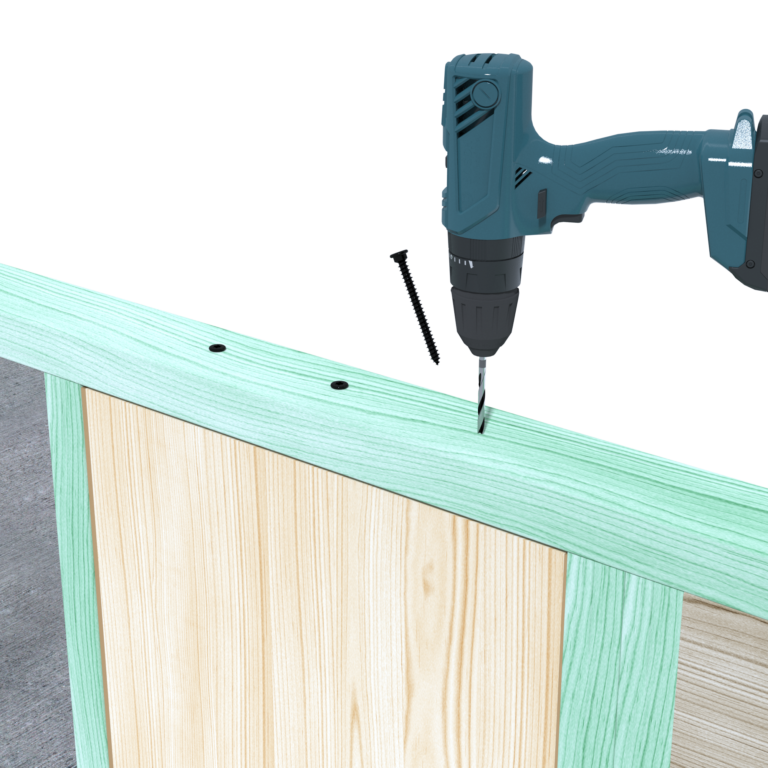
Step 5
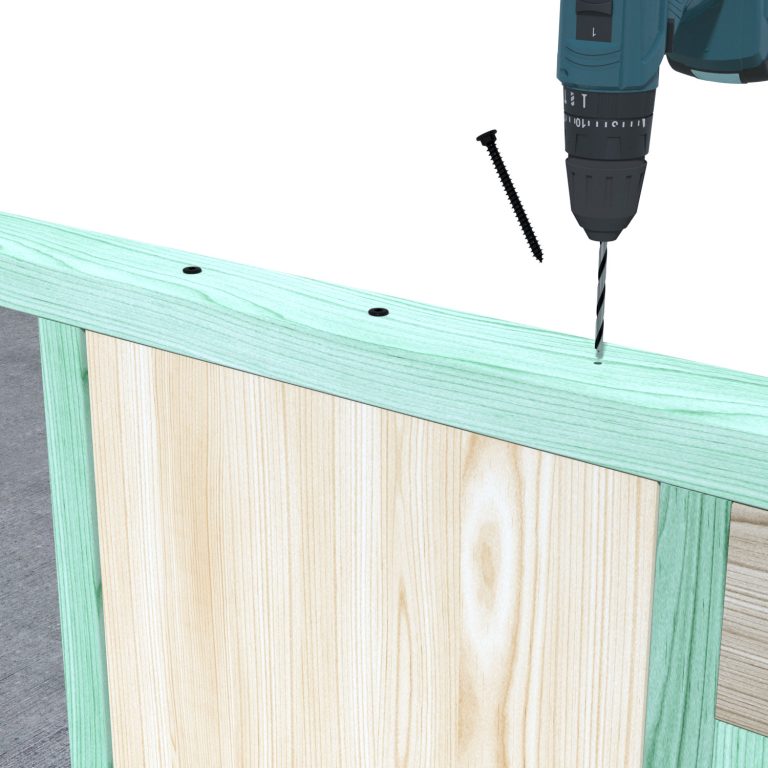
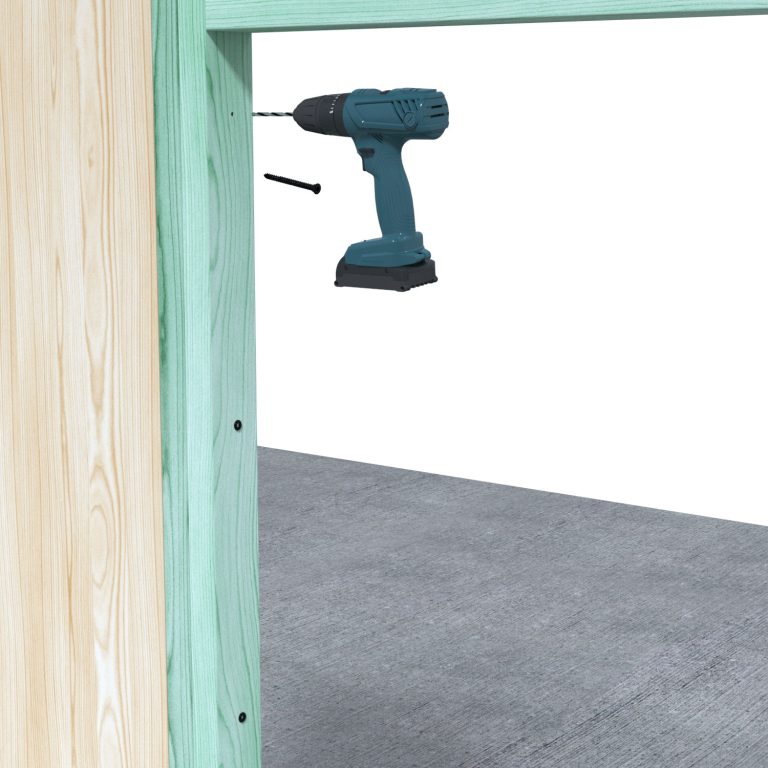
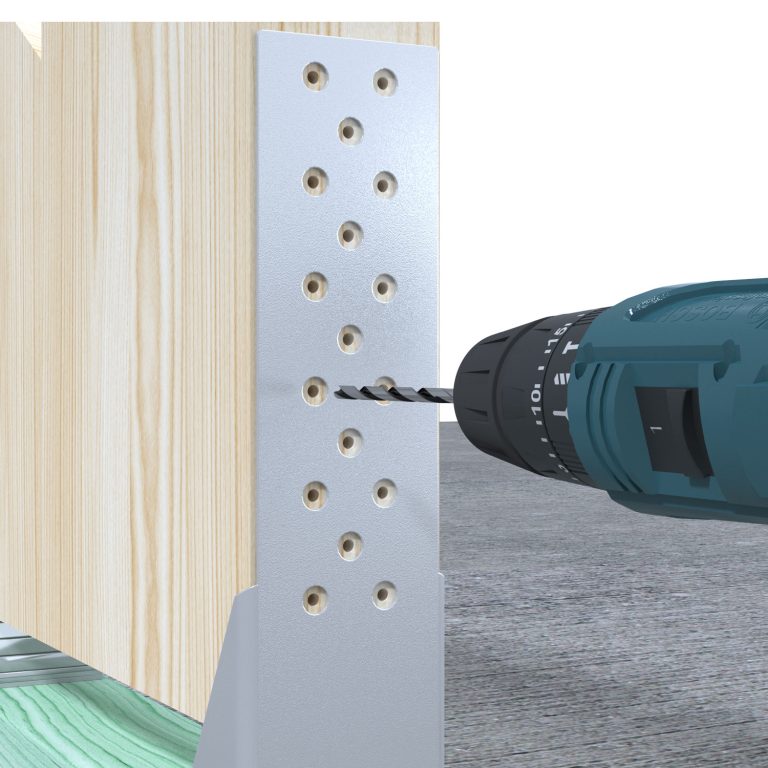
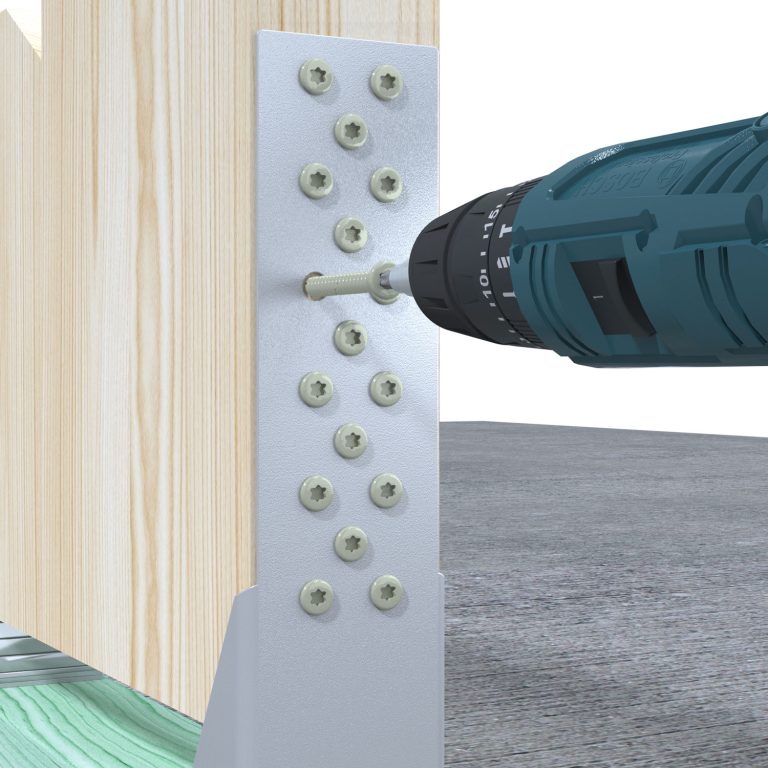
Pre-drill* screw locations and install** following number of screws to fix the top plate to glulam:
- 3 screws for GLT size up to 360
- 4 screws for GLT size up to 500
- 5 screws for GLT size up to 600
Pre-drill*: Pre-drill screw location with a 5mm diameter drill bit. Pre-drill hole depth shall be similar to but no deeper than the penetration depth of the screws.
Install**: The recommended torque setting is to be no more than 10 N.m.
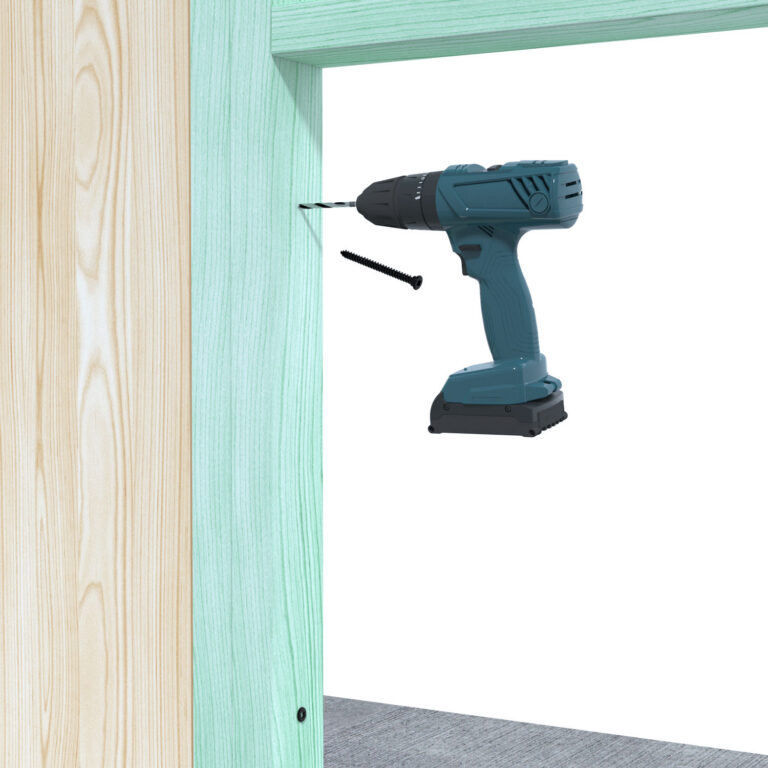
Step 6
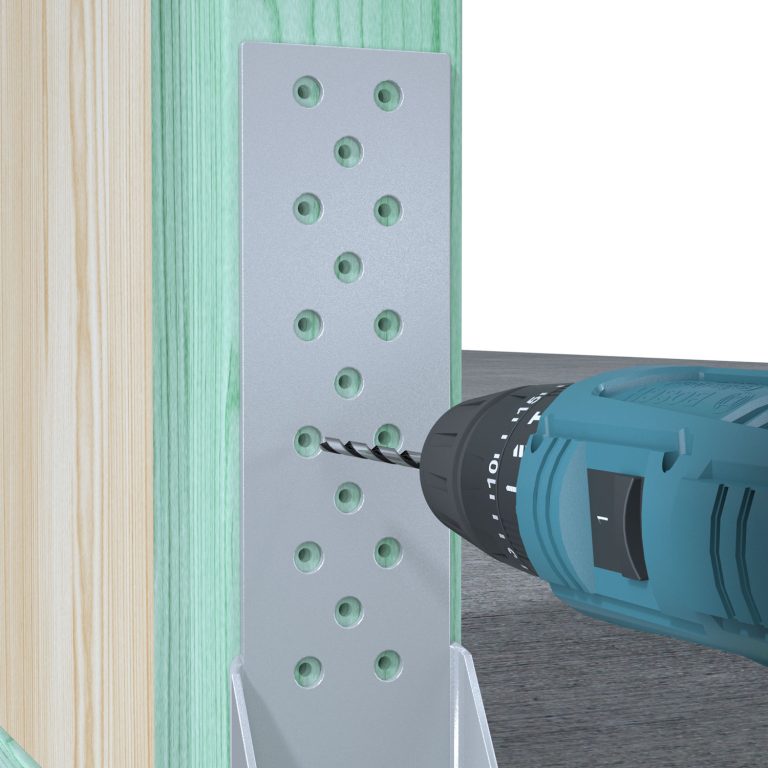
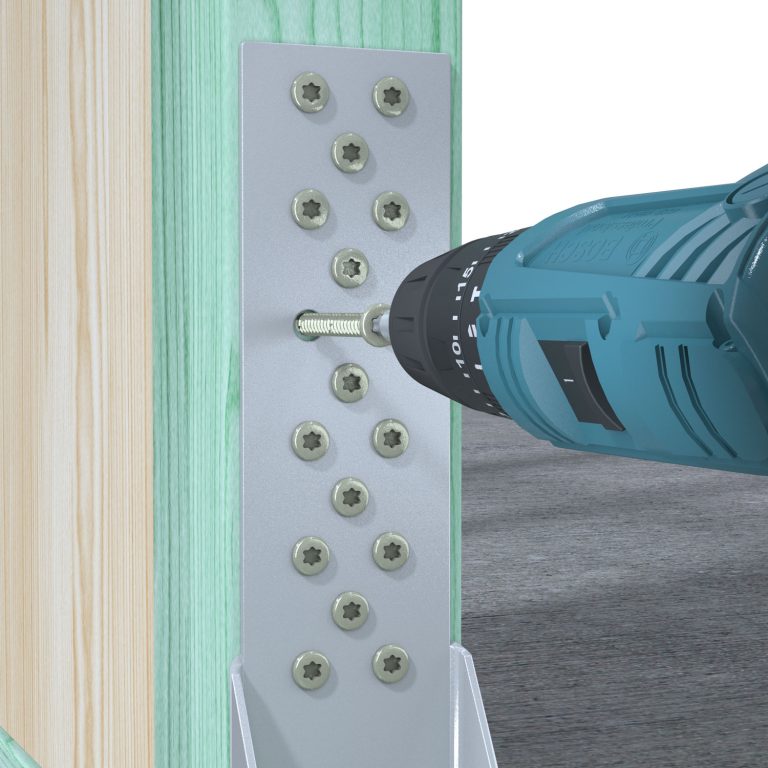
Pre-drill* screw locations and install** screws from the studs to the glulam short wall member at 600mm maximum spacing along the full length of the stud. Ensure that each screw embeds into the GLT member by at least 56mm.
Pre-drill*: Pre-drill screw location with a 5mm diameter drill bit. Pre-drill hole depth shall be similar to but no deeper than the penetration depth of the screws.
Install**: The recommended torque setting is to be no more than 10 N.m.
Installation Guide – MegaHold Down Bracket Face Inside
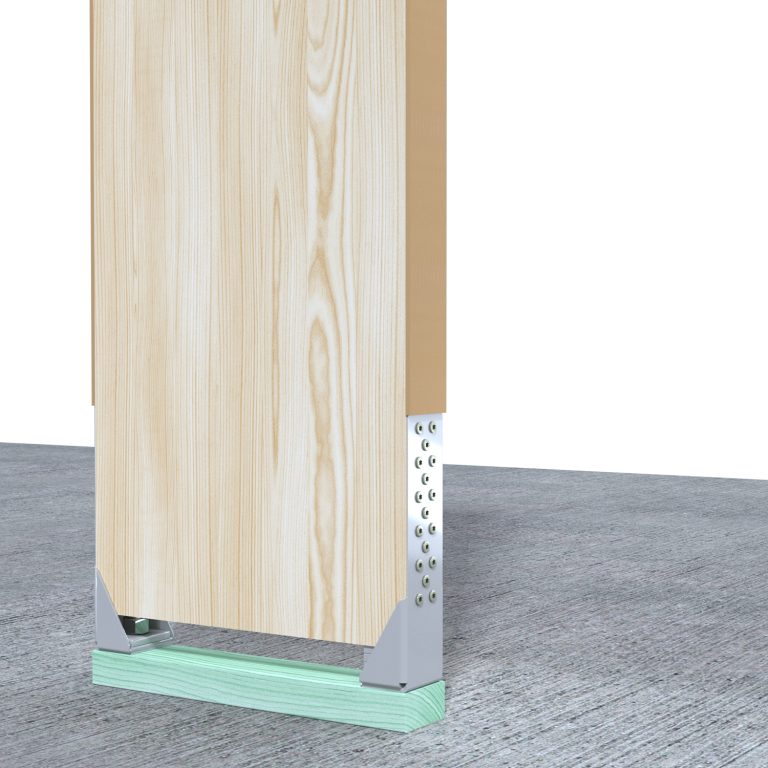
Step 1
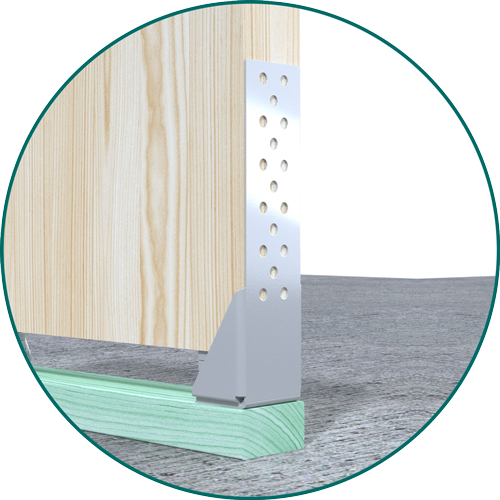
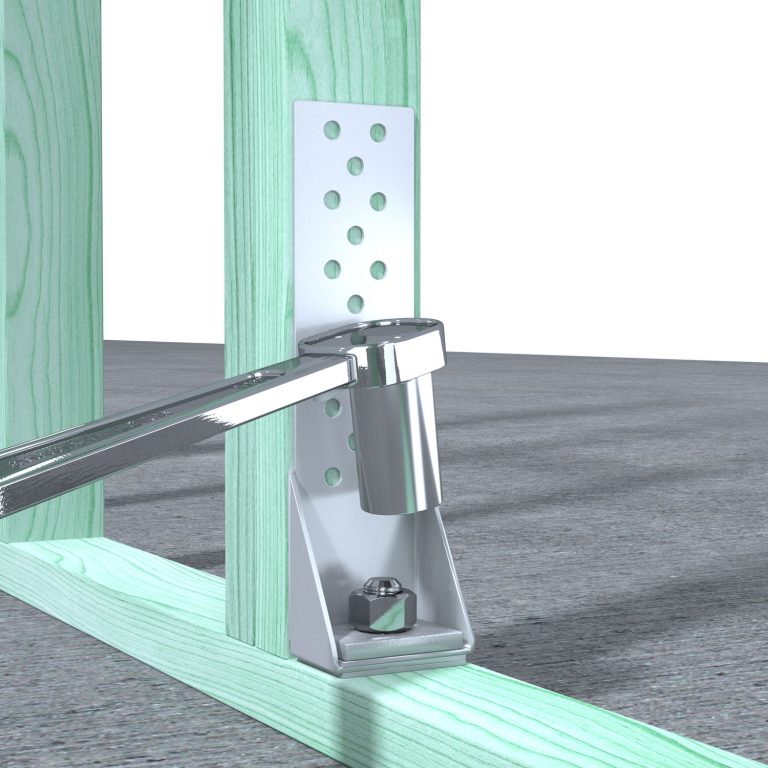
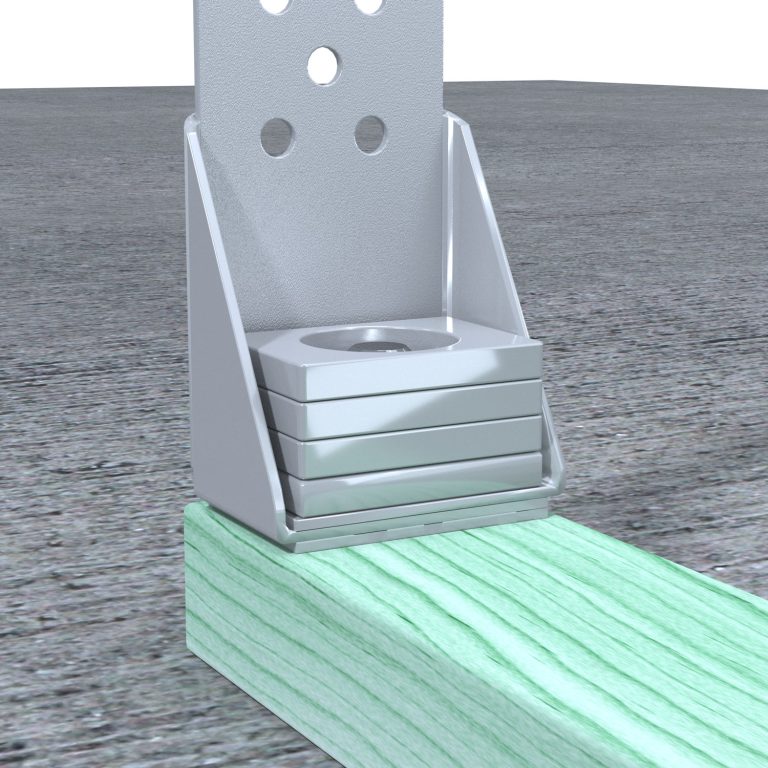
Fix the anchor* in the concrete slab at the designed location without tightening it. Trim a piece of framing timber and position it beneath the MegaHold Down bracket. Next, affix the MegaHold Down bracket on top of the bottom plate section, ensuring the 10mm thick washer plate is situated under the concrete anchor nut. Apply adequate torque to tighten the concrete anchor according to the anchor supplier’s instructions.
Note:
- The framing timber section shall be the same cross section size as the adjacent wall bottom plate.
- The length of the section shall be the same as the width of glulam.
Anchor*:
M20 for Small and Medium Short Wall Bracing kits (STD200-100, STD200-150, STD320-100 & STD320-150)

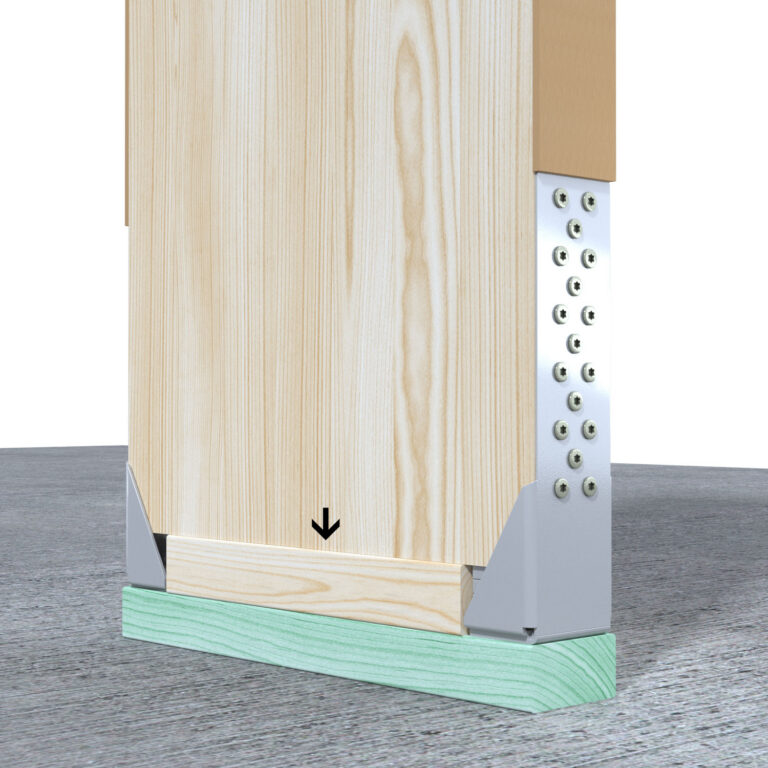
Step 3
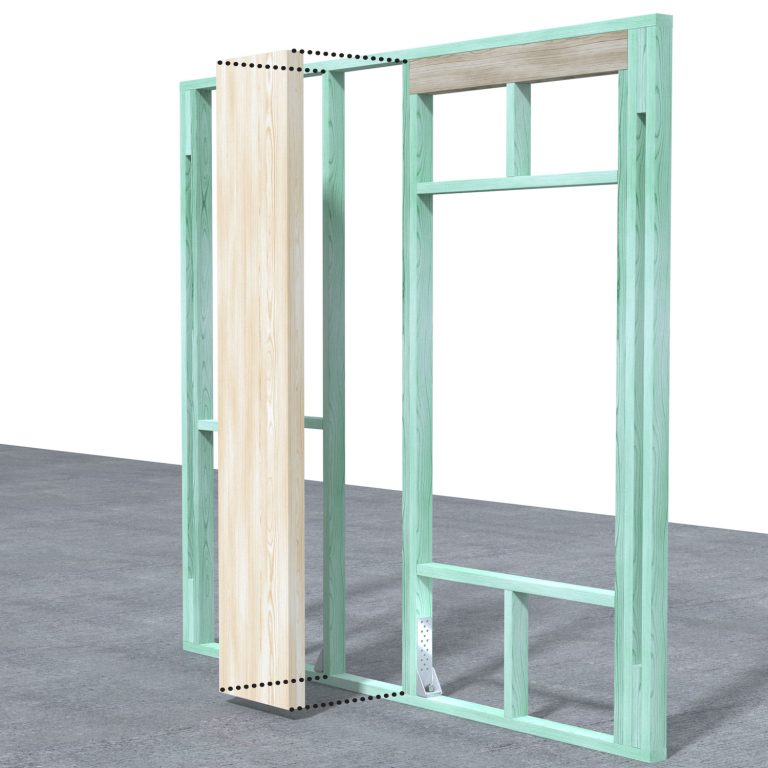
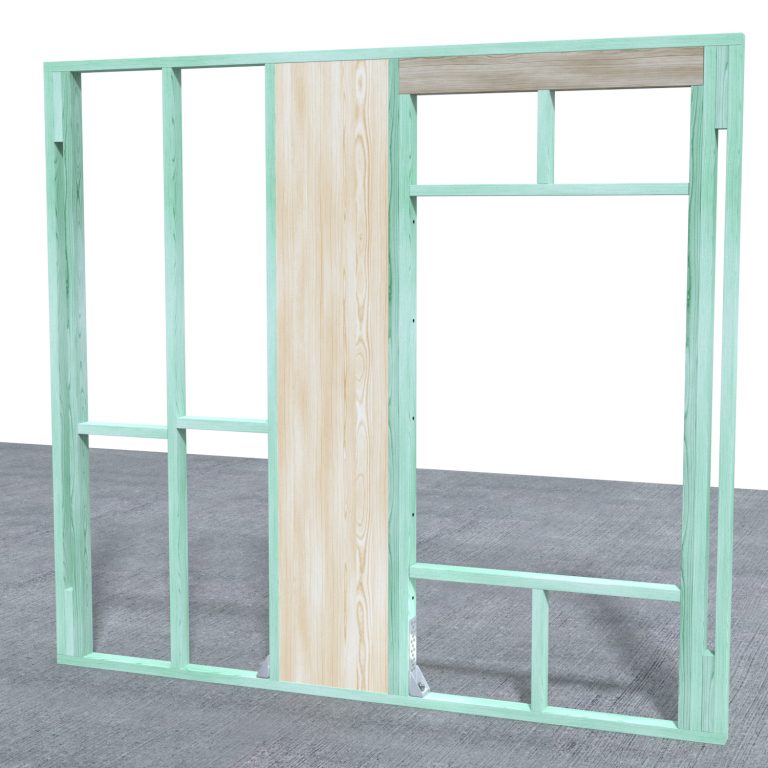
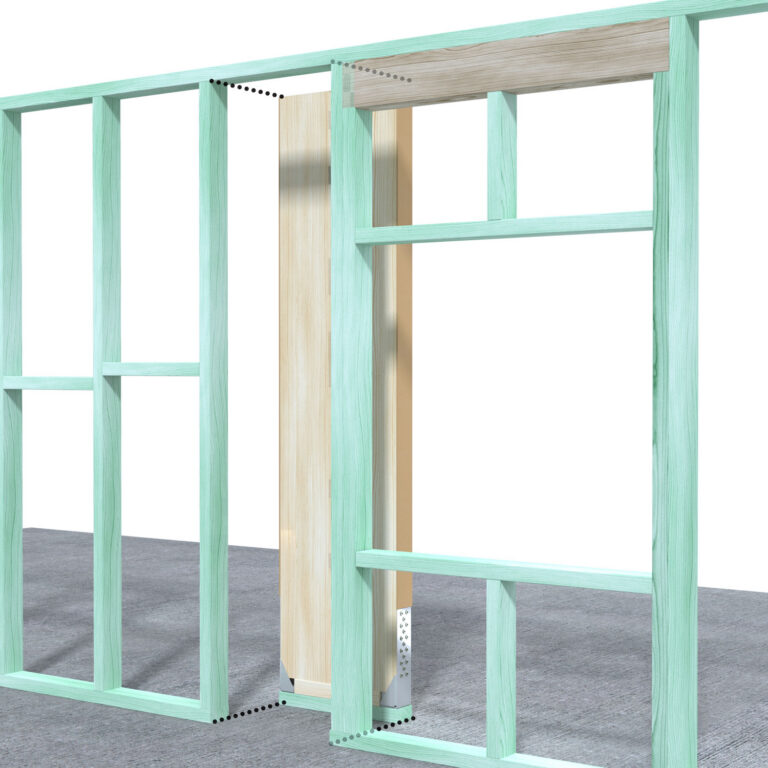
Fit the glulam short wall member inside the MegaHold Down bracket. Ensure the glulam seat is directly on the spacer and temporarily prop the glulam member.
Note:
Note: Plane down the thickness of the glulam corners to around
- 64mm for Small Short Wall Bracing kits (STD200-100 & STD200-150) or
- 84mm for Medium Short Wall Bracing kits (STD320-100 & STD320-150)
if the glulam is too thick to fit inside the MegaHold bracket comfortably.
Step 9
Pre-drill* screw locations and install** following number of screws to fix the top plate to glulam:
- 3 screws for GLT size up to 360
- 4 screws for GLT size up to 500
- 5 screws for GLT size up to 600
Pre-drill*: Pre-drill screw location with a 5mm diameter drill bit. Pre-drill hole depth shall be similar to but no deeper than the penetration depth of the screws.
Install**: The recommended torque setting is to be no more than 10 N.m.
Step 10
Pre-drill* screw locations and install** screws from the studs to the glulam short wall member at 600mm maximum spacing along the full length of the stud. Ensure that each screw embeds into the GLT member by at least 56mm.
Pre-drill*: Pre-drill screw location with a 5mm diameter drill bit. Pre-drill hole depth shall be similar to but no deeper than the penetration depth of the screws.
Install**: The recommended torque setting is to be no more than 10 N.m.