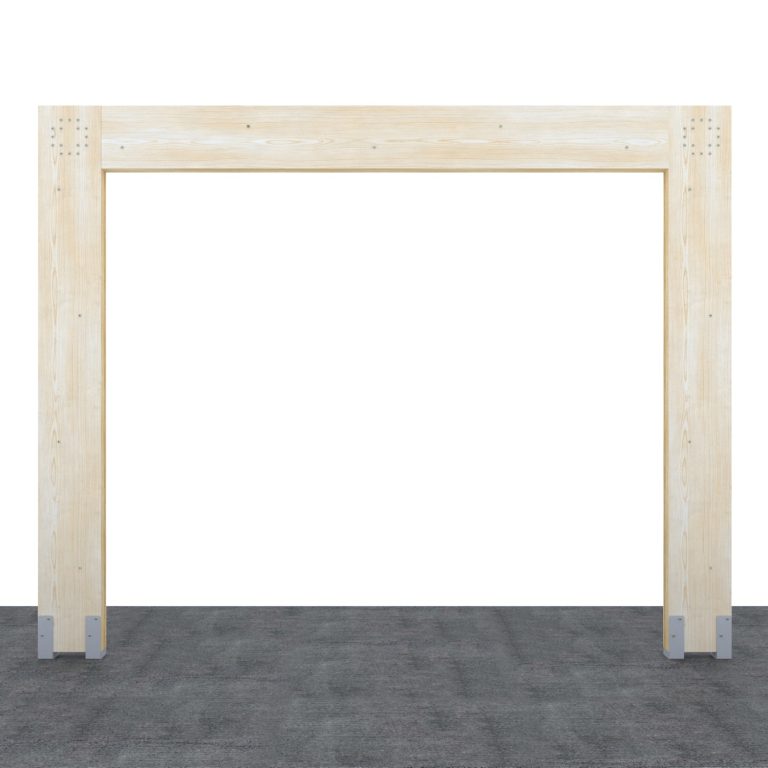
Installation Guide – EcoBrace LVL
Step 3
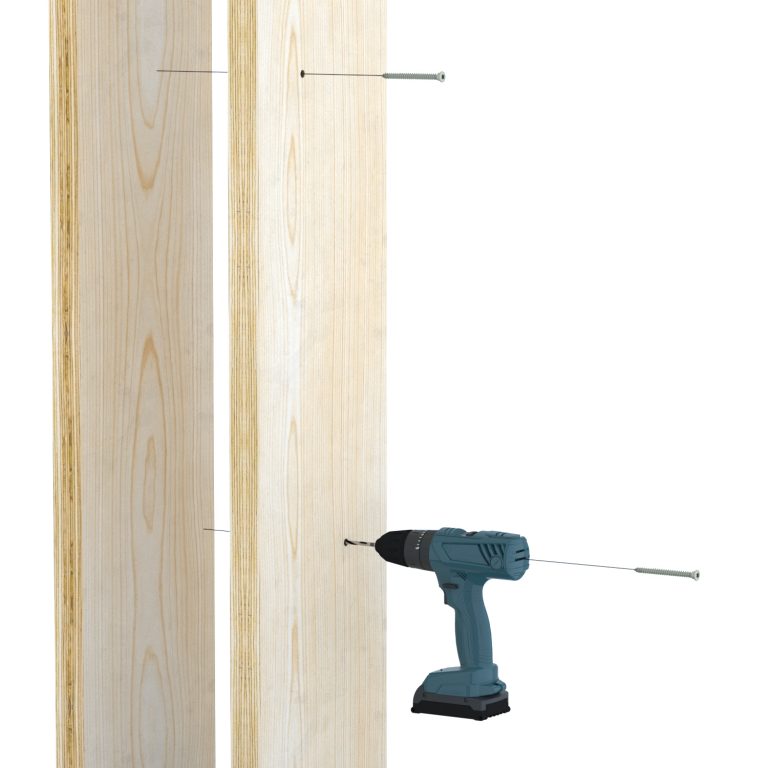
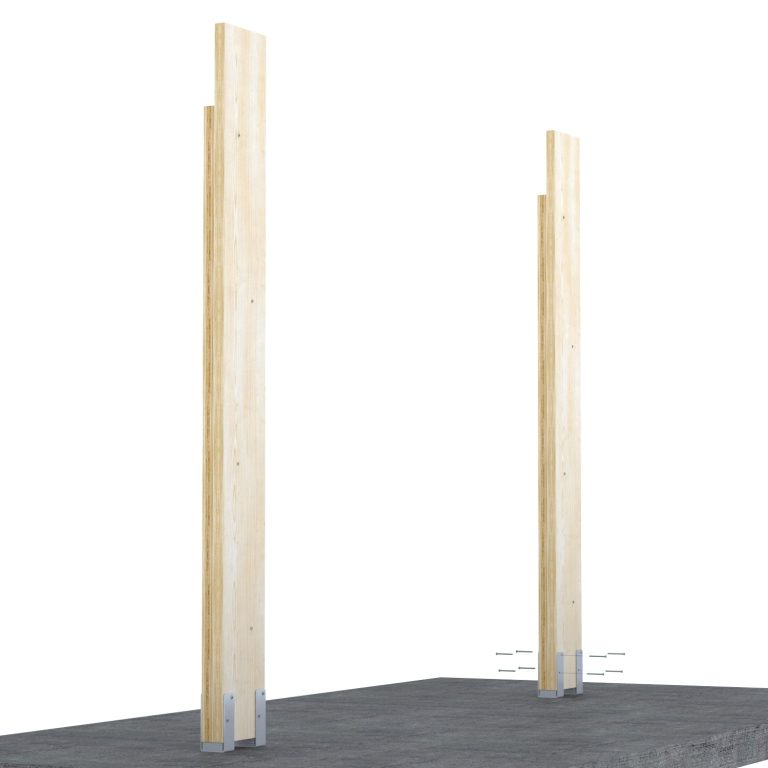
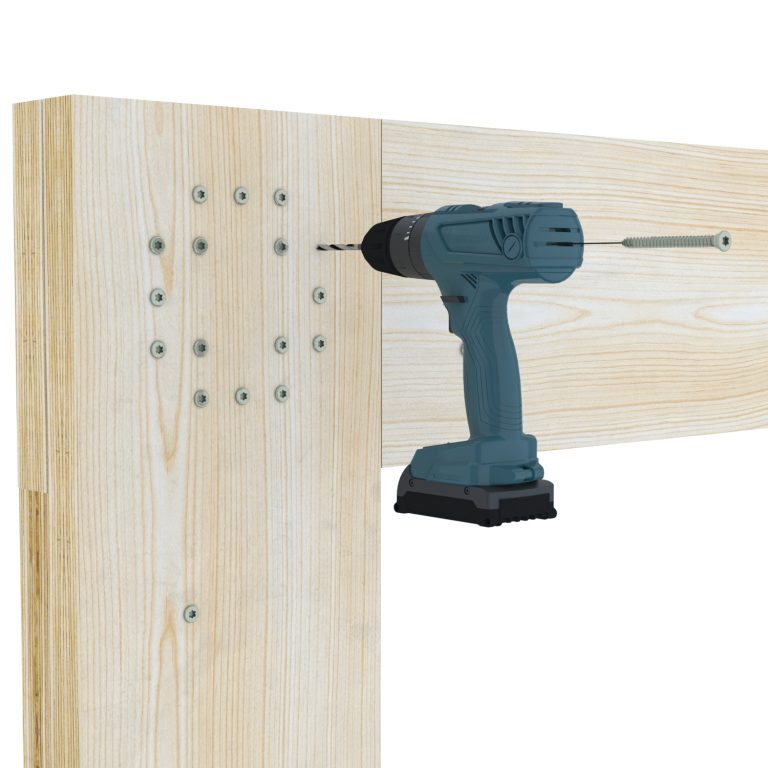
Assemble the LVL column according to the designed height to support the LVL Beam. Pre-drill* screw locations and install** screws at 600mm centre, staggering them to laminate the LVL column members together.
Pre-drill*:
Pre-drill screw location with a 5mm diameter drill bit. Pre-drill hole depth shall be similar to but no deeper than the penetration depth of the screws.
Install**: The recommended torque setting is to be no more than 10 N.m.
Step 4
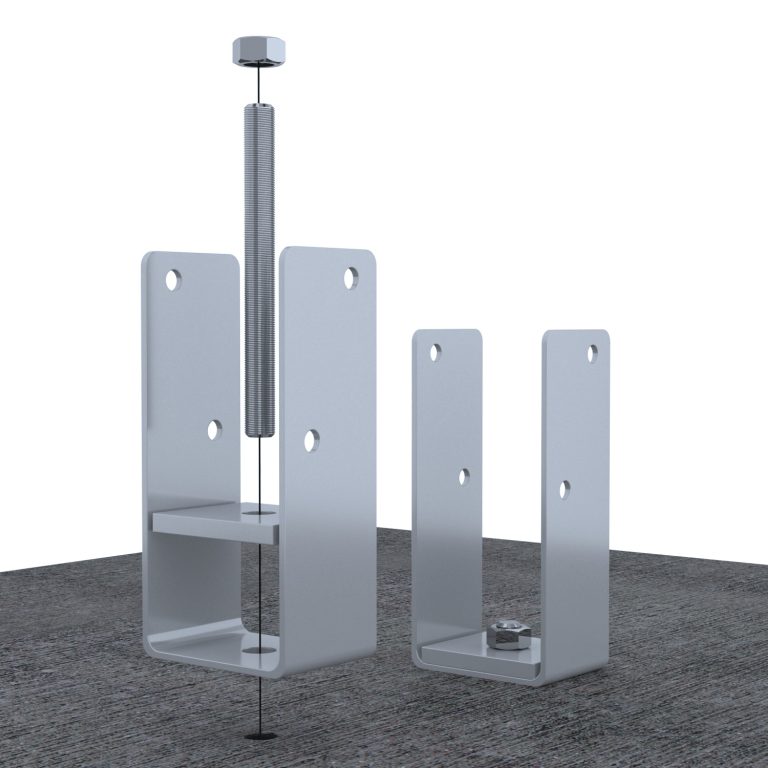
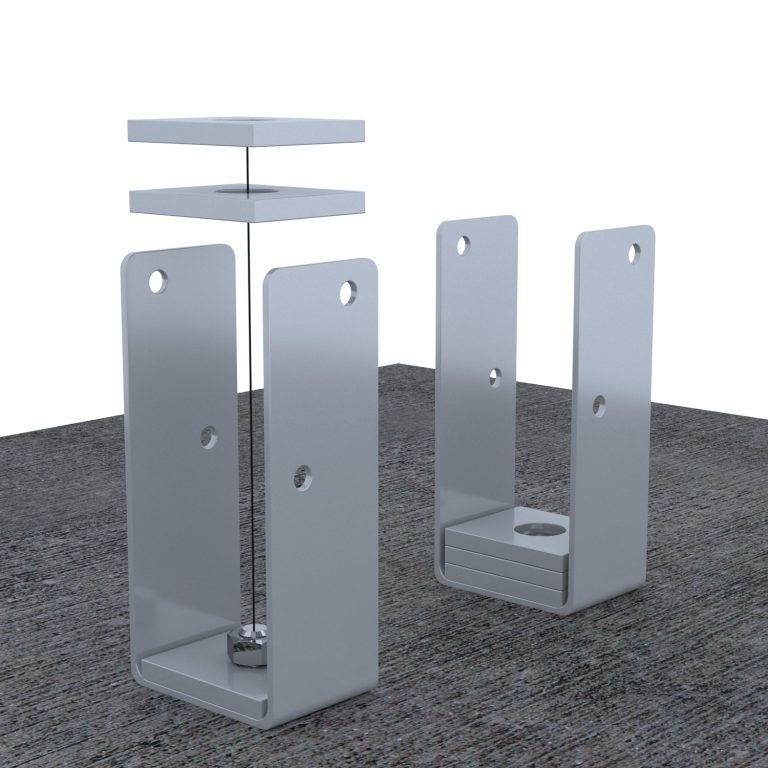
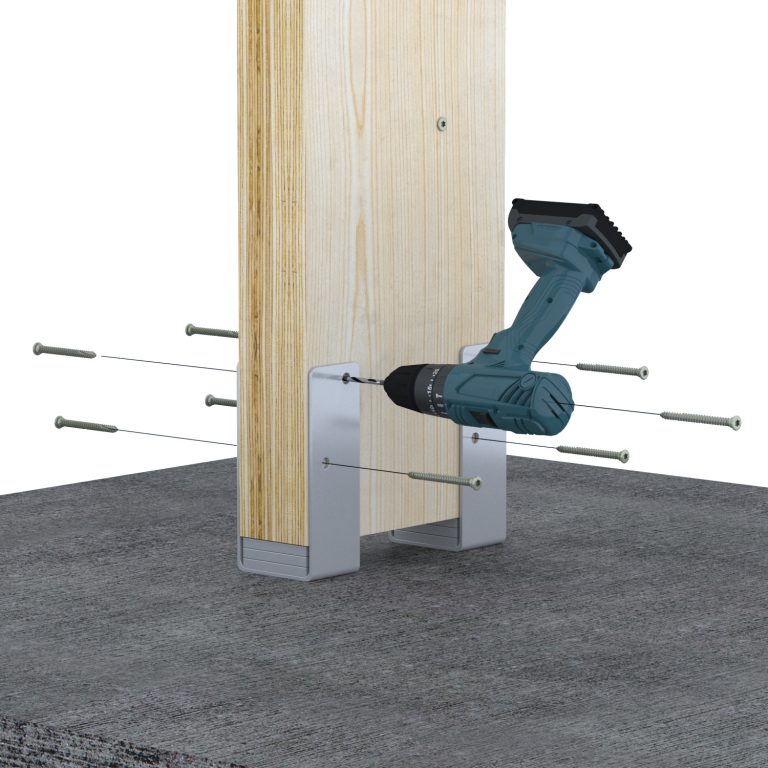
Insert the assembled LVL column into the EcoBrace brackets that are fixed to concrete. Pre-drill* screw locations and install** screws in all holes of the brackets to securely fix the column to the brackets. Temporarily prop the column if needed.
Pre-drill*:
Pre-drill screw location with a 5mm diameter drill bit. Pre-drill hole depth shall be similar to but no deeper than the penetration depth of the screws.
Install**: The recommended torque setting is to be no more than 10 N.m.
Step 6
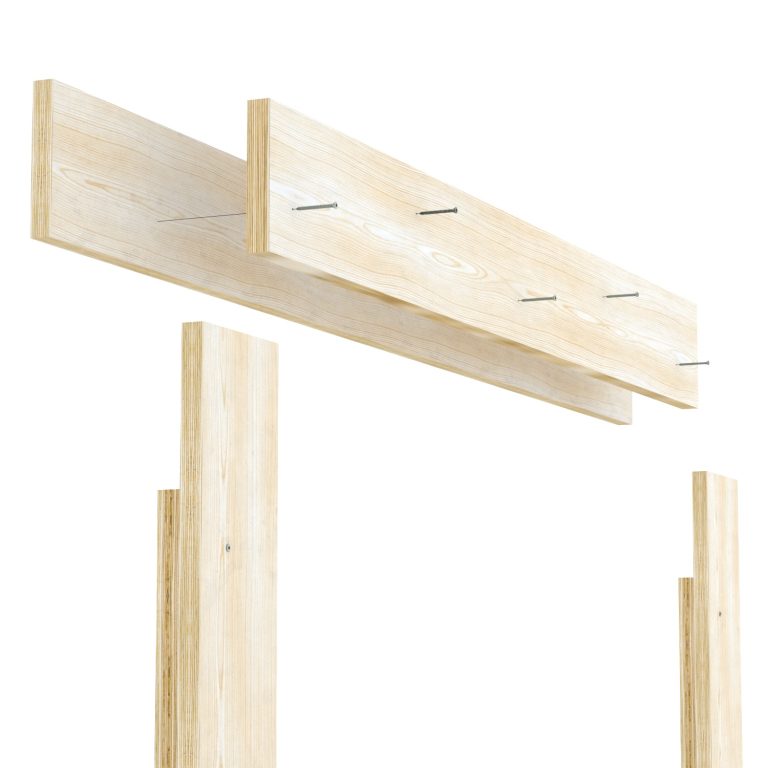
Assemble the LVL beam according to the design length to be supported by the LVL Column. Pre-drill* screw locations and install** screws at 600mm centre, staggering them to laminate the LVL beam together. Support the LVL beam onto the columns and prop the beam temporarily in place.
Pre-drill*:
Pre-drill screw location with a 5mm diameter drill bit. Pre-drill hole depth shall be similar to but no deeper than the penetration depth of the screws.
Install**: The recommended torque setting is to be no more than 10 N.m.
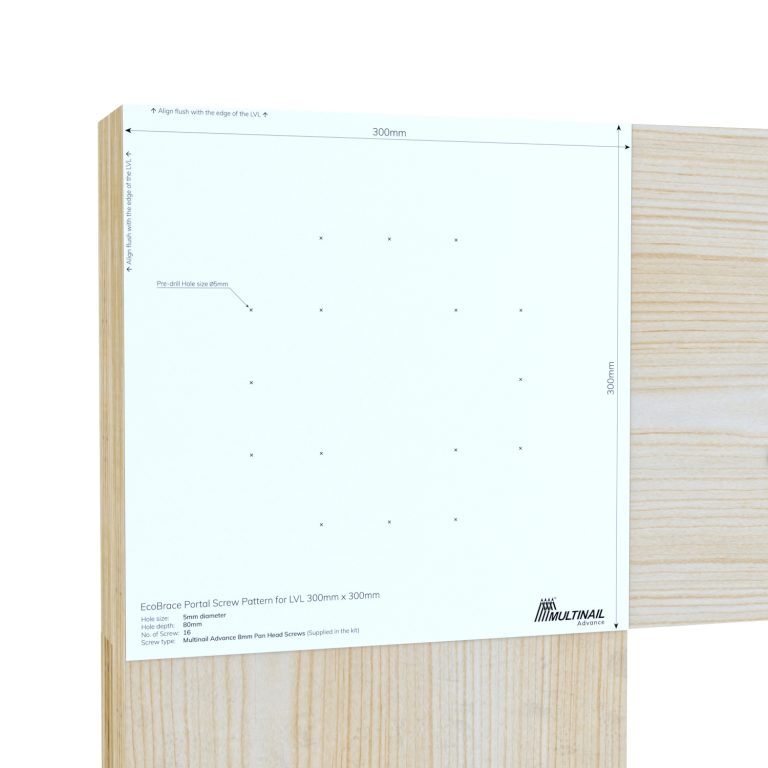
Step 8
Pre-drill* screw locations and install** screws at both knee joints to securely fix the beam to the column.
Pre-drill*:
Pre-drill screw location with a 5mm diameter drill bit. Pre-drill hole depth shall be similar to but no deeper than the penetration depth of the screws.
Install**: The recommended torque setting is to be no more than 10 N.m.